Control
Turnigy 9X FPV Ground Station V2
Bill of Materials:
[Qty. 1] Turnigy 9X (no module) [Qty. 1] FrSky 2.4GHz DJT Module [Qty. 1] 5.8GHz 200mw wireless video system[Qty. 1] 2650mAh TX LiPo Battery
[Qty. 1] LED Backlight kit
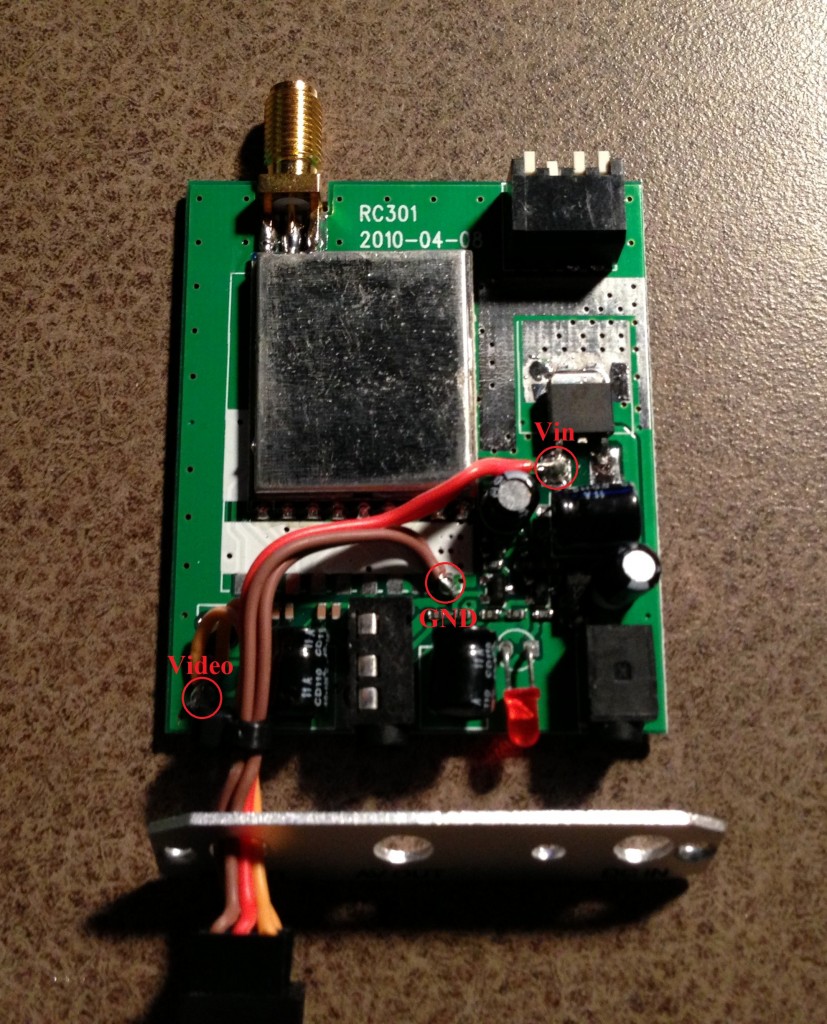
The first step in assembling the ground station is to prepare the video receiver. I chose to purchase the 200mW 5.8GHz video system from Hobbyking. After removing the enclosure, desolder one of the 2.5mm jacks. Wire two 3-pin female connectors in parallel to the video, gnd and vin connections. One of these connectors will serve as the source for the monitor and the other as power from the transmitter to the video receiver and monitor.
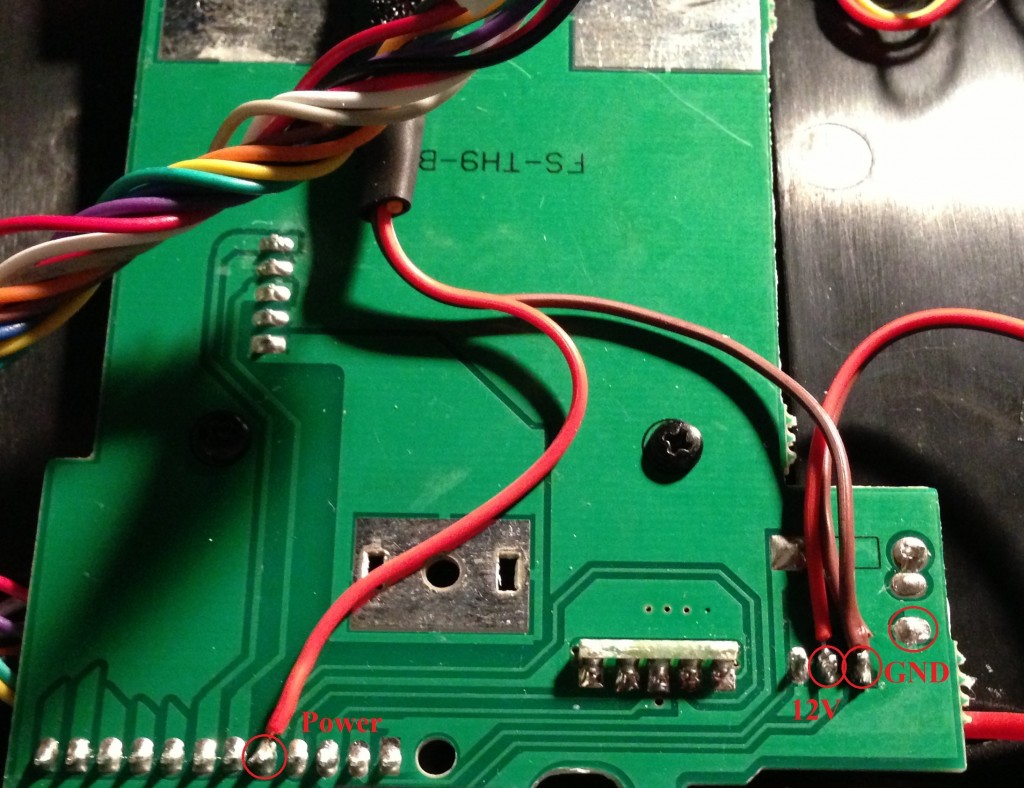
Remove the back panel from the 9X transmitter and locate the power and ground pins. The 12V pin will always receive power directly from the battery, but power pin is only powered when the transmitter is switched on. Run a male 3-pin cable with power and ground outside of the transmitter. This cable will plug into and power the video receiver and monitor.
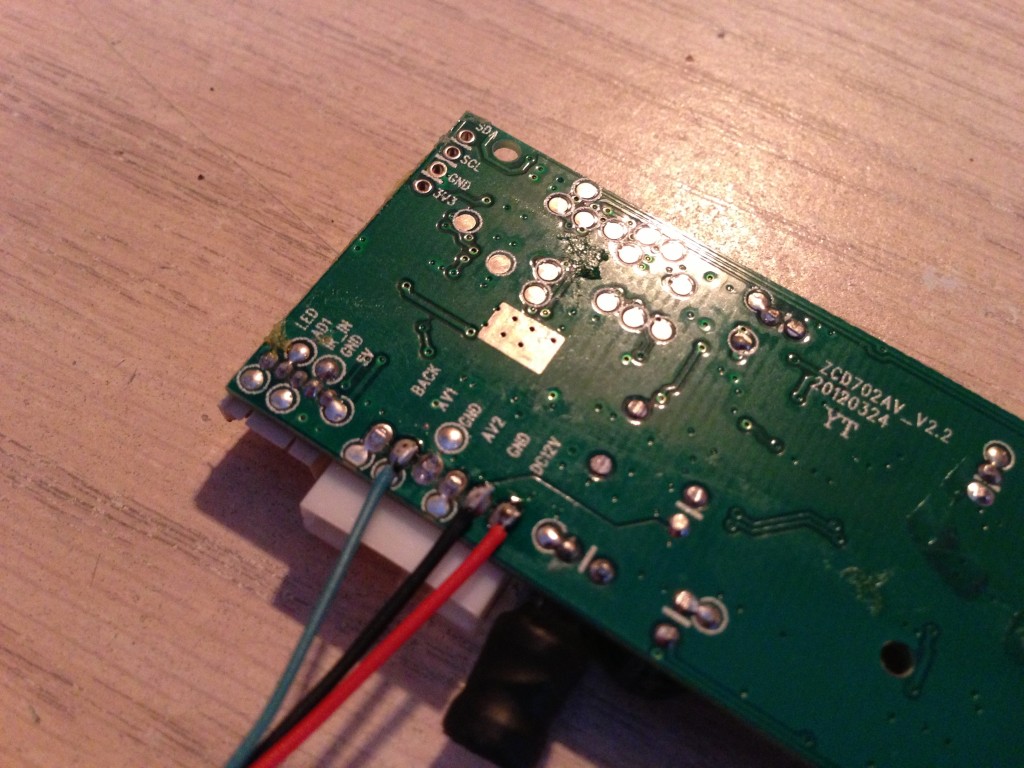
For the LCD Monitor I chose to purchase this 7″ LCD from Amazon. After opening the monitor enclosure remove the driver from the adhesive back of the LCD. Also remove the supplied input cable and solder three wires from AV1, GND and 12V. Terminate these wires with a male 3 pin connector.
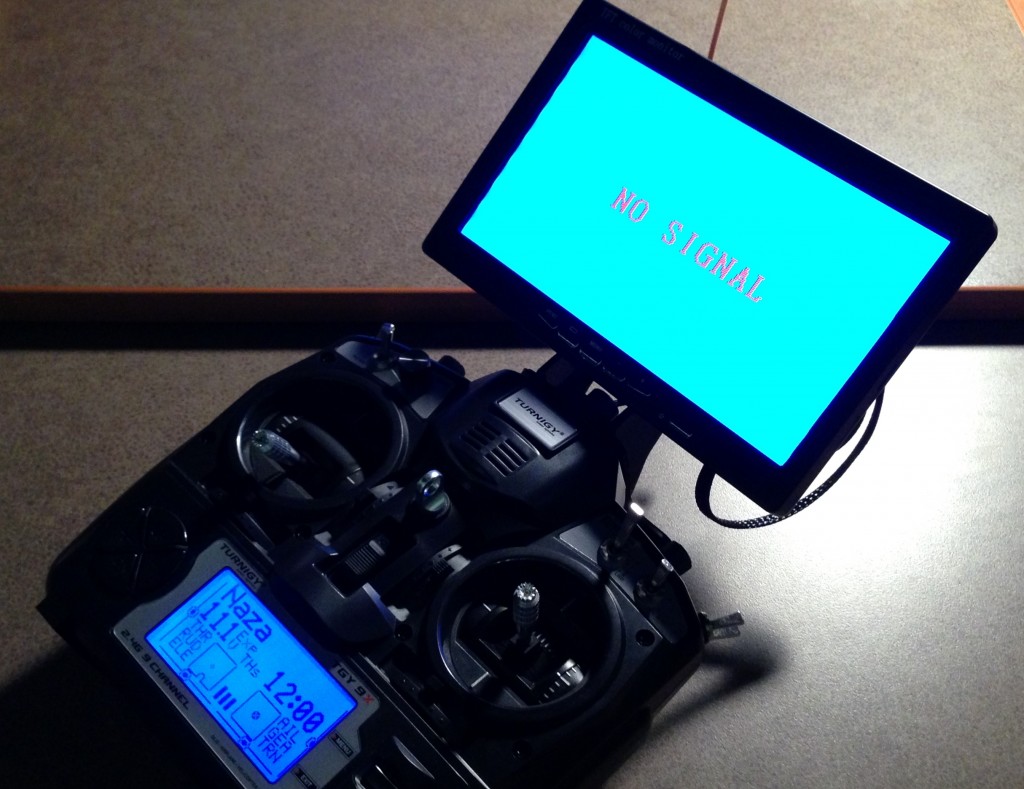
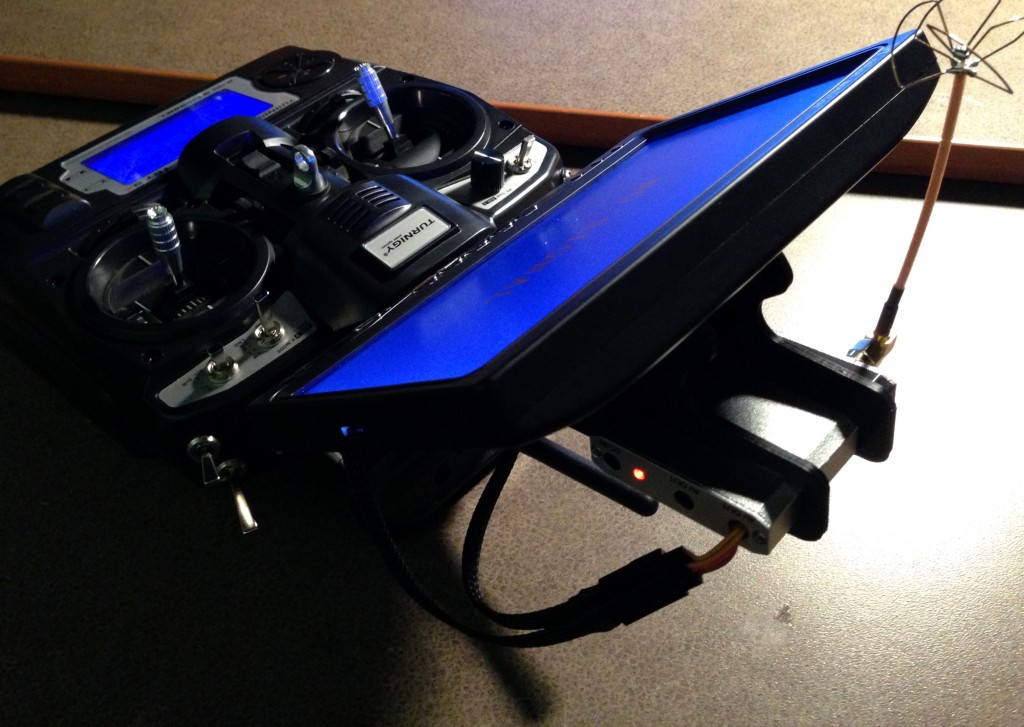
Reassemble the monitor enclosure and connect the 3 pin connectors from the transmitter and monitor to the receiver. To mount the LCD and receiver to the transmitter I have designed a plastic mount.
